
Guide – How to prepare the ground for composite decking, step by step
Discover the ins and outs of building decking and choose the perfect decking boards in our shop. Find practical advice, interesting facts and the latest news on our blog. Visit us and get inspired!

Proper site preparation for a composite decking terrace is essential for the durability and stability of the entire structure. Without solid foundations, the terrace may shift, sink or become damaged by weather conditions. In this article, we will guide you step by step through the process of preparing the site for a composite decking terrace, so you can enjoy a beautiful and functional outdoor space to relax in. It is worth reading this article for your own awareness, so that when a contractor carries out the installation, you know which aspects of ground preparation to pay attention to or what to ask when you receive a quote from a specialist composite decking terrace installation company. Of course, don't forget that our company also offers comprehensive construction of terraces using composite decking boards, including ground preparation. If you want to find out how we work, visit the "Our services" section.
Step 1: Choosing the location for your composite decking terrace
Choosing the right location for your terrace is the first and a very important step. Although many people opt for terraces adjoining the house, this is not the only option. If you are planning a terrace around a fire pit or getting ready to build a swimming pool that you want to clad with composite material, you need to think carefully about its location, taking several factors into account:
- Sunlight: Consider how much sun you want on your terrace. If you prefer shade, choose a more sheltered spot. Assess the site's orientation in relation to the compass points – south-facing terraces will usually get the most sun, which may require additional roofing or parasols.
- View: Choose a location that offers the best view from your property. Avoid places where buildings, trees or other obstacles block the view, so you can make the most of the surrounding scenery.
- Make sure the terrace is easily accessible from the house and other parts of the garden. It is also important for the terrace to have a convenient connection to the kitchen, making it easier to organise meals outdoors.

Step 2: Preparing tools and materials
If you intend to prepare the ground for your composite decking terrace yourself, this section is ideal for you. Why? It's useful to know which tools will come in handy for DIY work at home. Before starting work, prepare all the necessary tools and materials. Here is a list of what you will need:
- Tools for removing the surface and levelling the ground:
- Spade and rake: For removing the old surface, grass and roots, and for levelling the ground.
- Hammer, spirit level, tape measure and string: For taking precise measurements and marking the levels and boundaries of the terrace.
- Tools for concrete:
- Concrete mixer, bucket, trowel: These tools will be essential if you plan to pour concrete foundations.
- Tools for precise measurements:
- Laser level, tape measure, protractor: To ensure that all components are at the correct level and at the correct angles.
- Insulating materials:
- Geotextile or insulating membrane: To protect against weed growth and moisture.
- Structural components:
- Composite joists, concrete posts, foundation cups: These components will form the base of your terrace structure.
- Personal protective equipment:
- Gloves, safety goggles, steel-toe boots: To ensure safety while working.
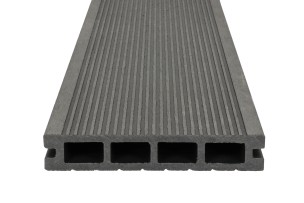
SELECT composite decking board 25x140 - 5,0 m
Price per 1 linear metre of board: 17.27 zł
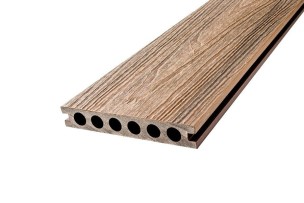
PREMIUM composite decking board 23x138 - 3,5 m
Price per 1 linear metre of board: 24,85 zł
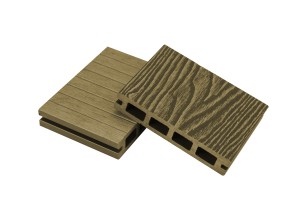
GARDPOL PREMIUM composite decking board 25x135 - 2,90m
Price per 1 linear metre of decking board: 25,18 zł
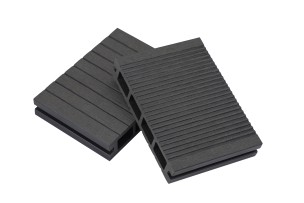
GARDPOL composite decking board 25x140 - 1,9 m
Price per 1 linear metre of decking board: 21,73 zł
Step 3: Removing the old surface and vegetation
Personally, when talking to customers, I often hear questions such as: “Won’t anything take up residence under this decking?” or “I read online that weeds collect under decking when concrete posts are used, and sometimes grass grows there.” The only correct answer is to confirm this information! Yes, poorly prepared ground beneath the decking, followed by its installation, can cause these problems. That’s why you should pay particular attention to this when preparing to install your decking using a composite system. Proper site preparation starts with removing all existing surfaces, vegetation and roots:
- Old surface: Remove all concrete slabs, paving, grass and other materials covering the area. Use a spade or mechanical tools to make the work easier. Remember to clear the area where the decking will be built thoroughly.
- Vegetation: Dig up and remove all roots and plants to prevent them from growing back beneath the decking. Roots can damage the structure, so it is important to clear the area thoroughly. Use a rake to remove stones and other obstacles.
- Levelling: Make sure the ground is level and ready for the next stages of work. If the ground is very uneven, consider using a mini excavator. Add or remove soil as needed to achieve a level surface.


Step 4: Levelling the ground
We’re getting closer to preparing the area for the installation of composite decking. If you’d like to see how our experts do it, visit the “Our services” section, where we present the entire process of purchasing a comprehensive composite decking installation service. After removing the old surface and vegetation, proceed to level the ground:
- Ground preparation: Use a spade and rake to level the soil. Add or remove soil as needed to achieve a level surface. Good ground levelling is essential to prevent problems with the decking settling later on. Make sure all larger stones and roots have been removed.
- Checking the level: Use a spirit level to check whether the ground is level. Mark out the level using strings and stakes to make the subsequent work easier. You can also use a laser level for even more precise results. Levelling the ground prevents the load from being distributed unevenly across the foundations, which is particularly important for larger decks.
Step 5: Preparing the foundations
We are now moving on to the most important point in our guide. We must bear in mind that composite systems are products that will remain on our decks for the next dozen or so years, or even longer. The composite decking will last a long time only if the ground and foundations are properly prepared with many years of use in mind. We will now discuss the different types of foundations. Foundations are a key element of a stable deck structure. You can choose from various types of foundations, such as poured concrete posts, concrete posts, concrete blocks or a concrete slab:
- Poured concrete posts: Dig holes in the ground and pour in concrete to create stable foundations. Poured concrete posts are particularly durable and provide a solid footing for the deck structure. The holes should be 50 to 80 cm deep, depending on ground conditions and local building regulations.
- Concrete posts: Place ready-made concrete posts in the prepared holes. Concrete posts are easy to install and provide a solid base. Once the posts are in the holes, fill the space around them with concrete or cement mortar to stabilise them further.
- Concrete blocks: Concrete blocks are an alternative to traditional posts. Place the blocks on level, firm ground, ensuring they are stable and evenly spaced. Concrete blocks are easy to install and can be used as individual supports for the decking joists.
- Concrete slab: A concrete slab provides a uniform, solid base for the deck. Make sure the slab surface is level and suitably reinforced. A concrete slab is particularly useful when the ground is uneven or needs additional reinforcement.
- Installation on an existing concrete slab: If you already have a concrete slab, you can use decking supports to align the composite decking with the house entrance or the currently popular HS window (sliding window). The supports allow you to set the deck level precisely.
All foundations must be set at the appropriate depth to ensure the structure is stable. Make sure they are evenly spaced and level. Properly prepared foundations prevent the decking from settling and shifting, which is essential for its durability.


Step 6: Laying the insulating layer
In this section, we will once again focus on one of the key elements of ground preparation – the insulation layer. This is an important step that prevents weeds and grass from growing through the composite decking. Properly installed insulation is essential to help look after your decking for years to come. Take the following factors into account:
- Purpose of insulation: Insulation prevents weeds from growing through, which could damage the decking. It also protects against moisture, extending the life of the structure. Moisture can cause metal components to corrode and composite materials to deteriorate, which is why suitable insulation is essential.
- Types of insulation: Geotextile or sheeting are most commonly used. Geotextile is more durable and allows water to pass through, preventing moisture from building up. Sheeting, on the other hand, is cheaper, but can trap water, which may lead to drainage problems.
- Installation: Lay the insulation layer over the levelled ground, making sure it covers the entire area beneath the future decking. Make sure the insulation layer is properly secured so it does not shift during installation. Properly secured insulation will prevent problems with weeds and moisture, which is essential for the durability of composite decking.
Step 7: Installing composite joists
Joists form the base of the decking structure, so choosing and installing them correctly is essential. When obtaining quotes for composite decking installation, consider which joists the contractor intends to use. Garden Polska does not recommend using wooden joists for composite decking. Instead, it is better to use aluminium or composite joists. If the contractor wants to use wooden joists, ask why they think they are better. Here is a brief summary:
- Choosing joists: Composite and aluminium joists are durable, weather-resistant and do not require treatment. Composite joists are made from the same materials as decking boards, which ensures their longevity. Aluminium joists are very strong and corrosion-resistant, making them an ideal choice for decking foundations.
- Installing joists: Lay the joists on the prepared foundations at even intervals. We personally recommend spacing the joists every 35 cm, which will provide the most durable installation possible. Make sure the joists are level, using a spirit level. Accuracy at this stage prevents problems with an uneven deck in the future.
- Avoiding wood: Wooden joists can warp and rot, so they are not recommended for long-lasting composite decking structures. Wooden joists also require regular treatment, which increases costs and workload over the long term.


Step 8: Checking the level and stability
Before installing the composite decking boards, make sure the structure is stable and level:
- Checking the level: Use a spirit level to check the level across the entire surface of the joists.
- Stability: Make sure the joists are stable and do not move. If you notice any instability, adjust the foundations or joists.
Summary
Preparing the ground for composite decking is a key stage that ensures the durability and stability of the entire structure. Choosing the right location, tools and materials, and carefully completing each step are the key to success. If you have any doubts, do not hesitate to use the services of professionals to make sure your decking will not only look beautiful, but also last.